There are different ways of keeping kings. Keepers often debate what way is best. My intent here is to provide both points of view and let you choose what you think works best for you. Just because I keep my kings one way, doesn't mean I'm against keeping them another. The way I keep mine is what works best for me and I believe it works good for my snakes as well.

One thing you must always remember is snakes are escape artists. I've lost several kingsnakes in the past, because I didn't respect their escaping abilities. They can push off snap on lids, so always be sure there is some kind of latch on the door to the enclosure or container. Make sure any lid used perfectly fits against the rim of the container, so that there are no gaps the snake can squeeze through. With hatchlings, be sure no ventilation holes are large enough for them to put their head through and get stuck. Hatchlings can be kept in well ventilated small plastic containers the size of a shoe box, maybe even smaller. I prefer the size of a shoe box or even a ten gallon tank with a sliding screen top. Some breeders recommend not using enclosures too large. They believe the baby snake feels insecure in a larger cage, but I've never had a problem as long as there were adequate hiding places. My experience may vary from yours. Juveniles should also be housed alone. At this age they have a very high tendency towards cannibalism. Some keepers will house them together once they are large enough to take small mice and brumate them together after the first year in attempts to bond them. Most keepers believe this is risky and refuse to even try. There are stories of Cal kings eating each other, and it has happened enough times to consider this species cannibalistic. This situation has been seen in the wild as well.
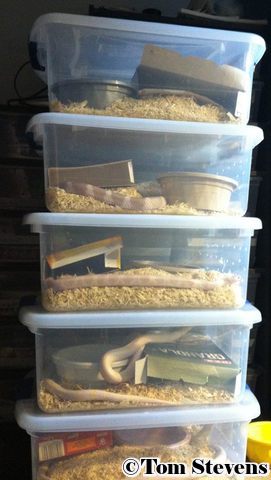
I think adults fare well in an enclosure that measures about 36" long and 12" wide or a 32 quart tub. Exceptionally large adults might do better in a 41 quart tub. Its really up to you, but I don't feel its good to cramp them. Racks re preferred by many keepers, because they take up little space and are easy to clean. Terrariums or glass tanks with screen tops are preferred by those who like to display their snakes in a nice natural looking set up.
Screen top enclosures or any cage that uses screen as a means of ventilation, can present a problem to a snake that is constantly trying to escape. In time, they can rub their rostral scale right off and bleed. That scale never grows back and will leave them with permanent scarring and discoloration. One way to prevent this is to keep your snake fed and provide adequate hiding places where they can be completely out of sight and feel secure. Some snakes, you just can’t stop from constantly searching for a way out, so you may have to cover the screen with a finer non metal screen or move the snake into a plastic container or rack with small holes drilled out.

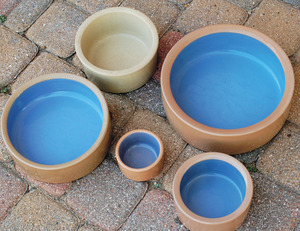
Its important to keep the cage fairly dry. Spilled water bowls should always be cleaned up right away. If you are having a problem with your snake turning over the water dish, you need to either get a heavier bowl or maybe even one that is shaped differently. I use ceramic water bowls that are heavy enough to keep the snake from spilling them all the time. One method used by many keepers is to purchase a bunch of deli cups without lids. Hot glue a deli cup to an area farthest from the heat source. This will act as a holder when you take another deli cup with water and place it inside the cup that was glued down. This way, the snake can’t flip the bowl over. Don’t fill the bowl all the way to the top with water, otherwise lots of water will spill out if your snake decides to get in the water. It is recommended to change the water daily. Some keepers will use a plastic container for water with a lid that has a hole cut in the middle. This helps to keep water from spilling out, but it can also be very dangerous to the snake. One keeper learned the hard way when he came home and found his snake dead in the water bowl. What had happened was the snake crawled into the water bowl, which raised the water level all the way to the top. The lid had a hole in the middle, but the snake was unable to find the hole and drowned. Perhaps the hole was kind of small or just small for the lid. I would highly recommend against this method.
|
|
|

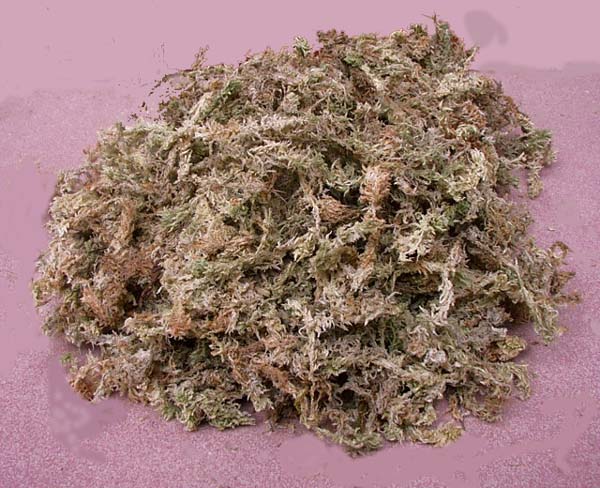
Humidity is also important. Too dry of conditions can lead to bad sheds, especially in the winter months. Its natural for a snake to be able to seek out moister areas if needed, so a moist hide spot is recommended. This can be achieved by placing a plastic container filled with moist sphagnum moss in the cage. This container should have a hole large enough for the snake to crawl into if and when it wants. At least 50% humidity is good, but there is no need for it to be too high.

|

|

|

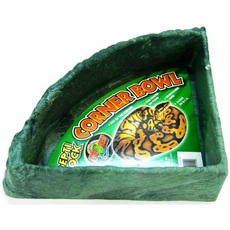
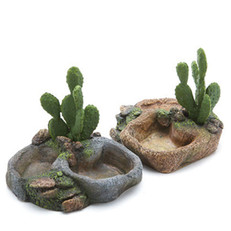
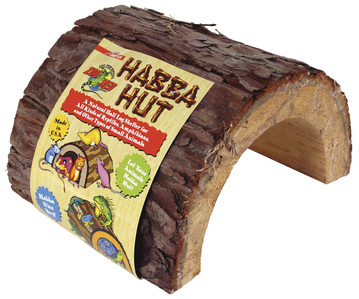
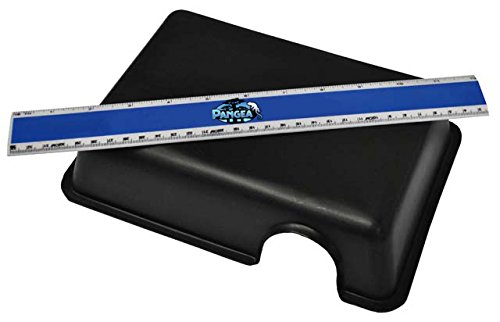
It is also important to place hides throughout the cage. It is recommended to place one on the cool side and one on the warm side. If you can only fit one in there, that’s better than nothing. The snake should be able to hide completely out of view. I think the best hides are those that are made heavy, so the snake can feel secure in its hide. I don’t recommend the very popular hollowed out logs that are cut in half. They are made to look good and for the keeper to still be able to see the snake. Just think how a Cal king acts in nature. When they are hiding, they are well covered and not exposed. PVC pipes are used by some keeps too. Just be sure its of appropriate size so that the snake can crawl inside to the middle and coil up snugly inside. If your substrate is a couple of inches thick, you can lay down a piece of tile on top of the substrate that will most likely be used by the snake as a hiding place.
|
Not recommended.
|
Recommended
|

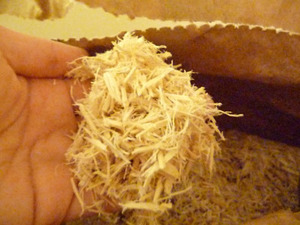
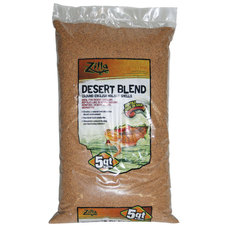
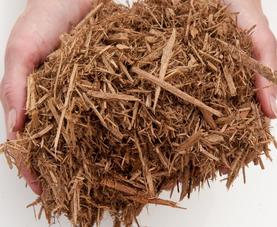
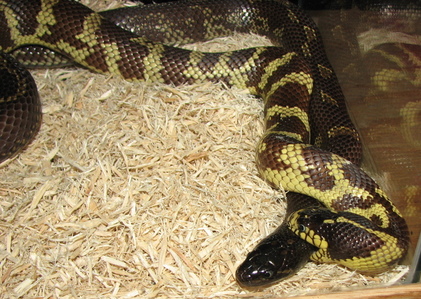
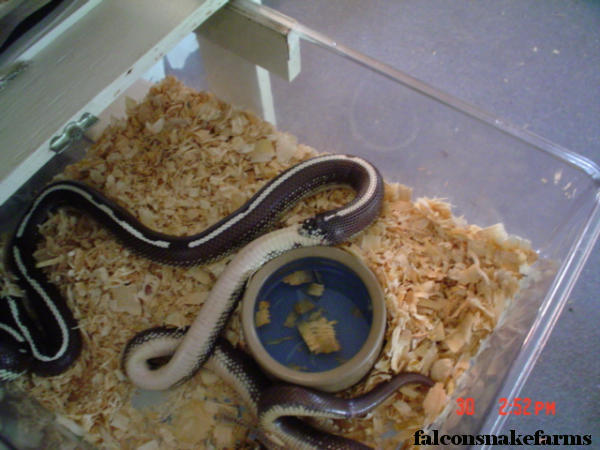
There are numerous types of substrate you can use such as newspaper, coconut bark and wood shavings. I prefer shredded Aspen, as do a lot of other keepers. It is very absorbent and easy to spot clean when needed. Cedar shaving are toxic and not used as a substrate. Pine shaving are used by some keepers, but others feel it is dangerous like cedar, because pine shavings are very similar to cedar shavings. Pine shavings could possibly carry the same ill effects to your snake as cedar can. The extracts from softwood like pine and cedar contain various aromatic compounds including hydrocarbons. Naphthalene, the active ingredient in mothballs has also been found in these shavings. Most of the research on the effects of using cedar and pine shavings has been done in warm blooded animals such as birds and rodents. Research has shown significant evidence that the hydrocarbons breakdown the cell walls of the lungs. This has been known to cause respiratory infections and opens areas for possible secondary infections. It is basically up to you if you want to take that risk or not. There’s also bags of small pieces of bark sold specifically for reptiles. I’ve tried them before and you end up throwing a lot of it away every time your snake defecates. Its not very absorbent, so its hard to get everything up. I wouldn’t recommend it. Some keepers also like to use garden mulch. This is ok, but be sure it is of the type that has been heat treated, so that it is more likely clean of bugs and parasites.
If you feed in the cage, sometimes small parts of the substrate can be ingested with the meal and can't be digested. This can lead to an impact of this substrate in the belly and can kill the snake if not removed. If you are using something that can lead to impaction, feed your snake in a paper bag or box.
If you feed in the cage, sometimes small parts of the substrate can be ingested with the meal and can't be digested. This can lead to an impact of this substrate in the belly and can kill the snake if not removed. If you are using something that can lead to impaction, feed your snake in a paper bag or box.
|
Shredded Aspen
|
Ground Walnut shell
|
Cypress Mulch
|

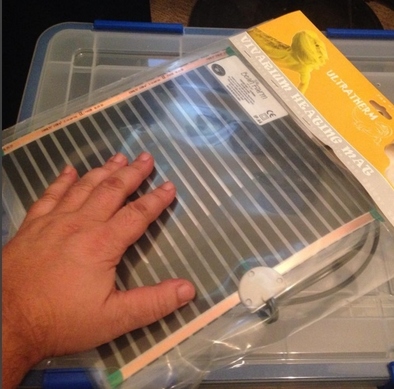
Air temps vs belly heat. There are two different ways to provide heat for your Cal king, one is through air temperature and the other is through belly heat or under cage heating. The most common and effective method of heating through air temp is by either heating the room the snake is in, or by the use of light bulbs or ceramic heat emitters (CHE). I used light bulbs up until about 10 years ago. I never noticed any real problems from using them other than the cages becoming too warm at mid day when the temps in the house would rise during the warmer months. Temps reaching over 90ºF can kill your snake. I'd always have to be sure the lights were off if I was gone during the day. There are thermostats to deal with that. One main problem I have with light bubs now is they never allow the snake to be out of the bright light unless its in its hide place, and they also dry out the air in the cage. Its not natural for a Cal king to be exposed to bright lights and dry conditions all day long, so I feel it adds stress. Ceramic heat emitters work just like a light bulb, except they don't give off any light, just heat. This would be a better alternative to light bulbs, but it still causes dryer than normal conditions in the cage, which can lead to stuck sheds. If you are using this form of heating in anything smaller than a 60 Gallon tank or similar sized cage, they tend to heat up even the coolest side of the cage. Your king then has no choice but to be exposed to warm temps and the dry conditions caused by this method. Snakes prefer warmer temps when digesting their food, getting ready to shed (dry conditions are not good during this time), and when females are gravid. The warmer a snake is, the faster its metabolism is working and the faster it is burning up energy. If your king has to be exposed to these constantly warmer temps, they will have to be fed well during this time. I don't choose to provide heat through air temps anymore, but I can't get away from it in the summer here in Southern CA. At that time I turn off all heat pads, not because they will overheat the cage, but simply because the room temp is an adequate amount of heat for my Cal kings. The only draw back to that is the snakes are forced to live at the temps they are in, but compared to using light bulbs and CHE's, the air isn't abnormally dry. If you can afford the extra cost of air conditioning the snake room and continue to provide heat, that would be a better way to go. The only reason why I support giving the snakes these choices is because that's exactly what they have in nature, even in the summer. Some keepers prefer one end of the cage to be in the 70's and the other about 85ºF. To achieve that using bulbs or CHE's, you would have to have a pretty large cage. A more practical way to offer these choices in a smaller cage is by using under tank heating, which affects the air temp very little to nothing on the cool side. Hot rocks can get pretty hot. I preferred to use the ones that reach 100ºF at the highest. When hot rocks get old, they can fail, and overheat. Some say the snake could get burned, but I've never had a snake just sit on a really hot hot rock. Zoo Med is starting to make hot rocks that become cooler when they fail, so I would stick to that brand to be on the safe side. It also helps to have a temp gun, so you can periodically check the temps of your heat pads, tape, or rocks. Heat pads or heat tape can be very effective in the range of 85 - 95ºF. If you are not using a thermostat and your heat pad is over 100º, you might want to elevate the cage about a quarter inch over the heat pad. The main reason for this is because the heat pad can actually melt because so much heat is being trapped in against it. The same thing can happen when using too much of a dense substrate like sand or ground walnut shell. Some heat pads can reach temps as high as 130ºF. When it comes to using heat pads that generate that kind of heat, I would strongly suggest using a thermostat over just elevating the cage. I also suggest not using the heat pad inside the cage. And I'd also recommend using just a small portion of the heat pad under the cage. A heated area of 6" X 4" is sometimes all I use, even with my largest kings. The entire snake does not have to be laying on the heat, but its fine if you provide a heated area about 1/4 size of the cage. The idea is to have the cool end of the cage as cool as it can be.
|
This is your standard Ceramic heat emitter. They work just like a light bulb, except they don't put out any light.
I feel these are a better choice than light bulbs. 
|
If you choose to use a light bulb, I'd recommend
to use a dark colored bulb that gives off as little light as possible. 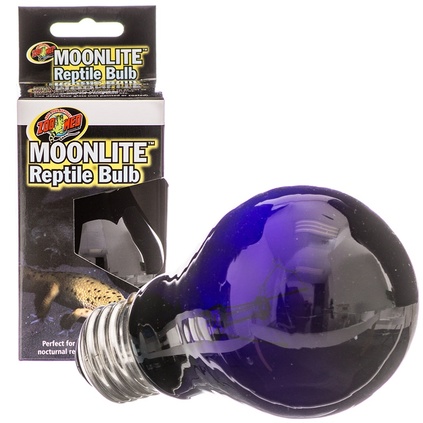
|


California kingsnakes will eat a variety of food items in captivity, such as mice, rats, lizards, chicks, and snakes. Common lizard species found throughout their range such as fence and side blotched lizards, are probably their favorite food item. So much so, that often if you feed them one, they will refuse to eat mice for quite some time after that. They may go a month without food before they start eating again. Most will eat anything no matter what. All snakes are individuals. I’ve had some Cal kings that would absolutely refuse to eat other snakes and some that would eat any kind of snake you threw in with them.
Out of all the food items, mice are the most practical in captivity. Kingsnakes will thrive on a diet of mice alone. Frozen mice can be purchased and sent overnight to your door. If packaged right, they will last well over 2 years in your freezer. Frozen mice can be thawed out easily by laying them out to thaw at room temperature or they can be soaked in warm water to thaw out faster. It would be best not to use extremely hot water or sit them right next to a hot light bulb when thawing. They can easily cook and when the snake eats them, they will burst open at the gut making a big mess. If they are thawed in water, they should be dried off as best as possible if you are going to feed them to your snake in his enclosure. Substrate tends to stick to a wet mouse and most of it is ingested with the mouse. You want the snake to ingest as little substrate as possible. Large amounts of substrate ingested can lead to impaction over time. Because the snake can’t digest this mass of substrate, it will have to be surgically removed or else the snake may die. This is one reason why some keepers prefer to feed their snakes in a container or box. To reduce the chances of impaction place the dead food item on a plate or anything similar inside their enclosure.
With some Cal kings, it’s important not to make any quick movements during feeding. Some may let go and show no more interest in feeding for the day if bothered. Sometimes they will eat from your hand or tongs, other times you’ll have to leave the food item in their cage and just come back later.
Its completely normal for snakes to refuse food at times. Most won’t feed a week or two before they shed. Some will start refusing food in August and eat way less often than they did in the spring. This can last all the way to the following spring. Lots of new keepers panic when these issues arise. Don’t panic. Make sure the conditions your snake is being kept at, are right. Make sure your snake is not being stressed. Excessive handling, rough handling, lots of movement near the cage, kids jumping and running around in the same room as the snake, too much light with no hide place, a cold draft from the air conditioner are just a few things to watch out for. There’s always a possibility it is sick and this might not be easily detected. It becomes a judgment call on your part if you want to give it more time or take it to a reputable reptile vet.
Juveniles can be fed baby mice, which are known as pinkies. Juvenile snakes should be bothered as little as possible when they are first introduced to their new homes. Some can stress real easy and refuse to eat and others will eat no matter what. When offering a pinkie, you can leave it at the entrance of their hide place or what I like to do is place them with the pinkie inside a small paper bag, fold down the top and paperclip it. I then set it back inside their cage and close the lid. Normally they have eaten when I return to check on them in an hour. Other types of containers can be used for this purpose also. This is also a good method to get baby snakes and even shy adults to eat that refuse to eat in their enclosure. If a baby is refusing to eat, be sure its being kept at the right conditions. Make sure it has adequate heat and good hiding places. Be sure it is being kept stress free away from kids and dogs and cats. Some methods used to get baby snakes to eat include teasing the snake with the dead pinkie and try to get it to strike. Sometimes it will strike, bite down and swallow the pinkie. Another way is to hold the snake in your hand near its neck so that its head can move freely around. Take a pinkie and continuously poke him in the face with it. Sometimes the snake seems to get mad and bites down on the pinkie and swallows it. If that doesn’t work, force the snakes mouth open and place the pinkie in his mouth and slowly let go. Sometimes if you push the pinkie down the snakes throat a little ways, it will eat it. Scenting the pinkie with a lizard often works. Wash the pinkie with soap and water and then rub a lizard all over it. If the lizard is dead, you could just freeze it and use it the next time. Using the water from a can of tuna can also work when scenting. If the snake is taking scented pinkies, you need to eventually get him off of that. To do that scent the pinkie less and less every time until scenting is not required. If these methods don’t work, you can try braining the pinkie. Take a sharp razor blade and cut into the pinkies head to get to the brain. Once that is done, squeeze the head to get some of the liquid brain to come out. rub that liquid all over the pinkies mouth and face. Then place it with the snake in a container or small paper bag and leave it alone for a while. This method is pretty disgusting, but works surprisingly often. Another method that works good is to place the frozen pinkie in boiling water for about 30 seconds. Place it in a container or bag with the snake after that. Sometimes nothing really works and its best just to brumate them for the winter at reduced temperatures. They normally come out of brumation with a very healthy appetite. See brumation. Juvenile snakes can be fed every 3 to 7 days. If they are fed too infrequently or too small of a meal for their size, they may not grow at all and are only eating enough to stay alive. Their food item should be around one and a half times their size at mid body. You should be able to see a noticeable bulge right after they eat. Some may only want to eat one food item, others may eat multiple. Generally the larger and more frequent the meals, the faster they grow. Normal shed rates for juveniles is from a little less than a month to a little over a month. The more they are eating, the faster they are growing, the more frequent they will be shedding. Cal kings grow pretty quickly during their first two years. They slow down considerably after three years, but still continue to grow slowly. Their shed cycles also become less frequent the older they get. Adults can become obese if fed too often, so you must be sure they are not eating too much. Generally, feeding every 10 days to two weeks is fine for adults. Female breeders should be fed more often depending on their weight. Juveniles cannot be over fed, they’ll just grow faster.
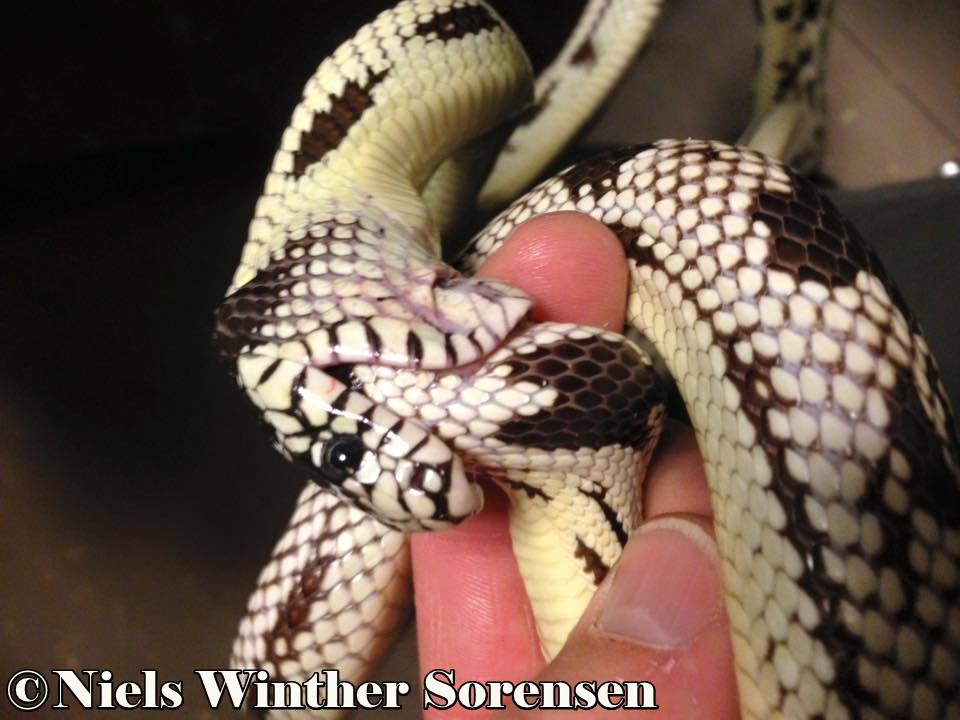
Some California kingsnakes develope a very aggressive feeding response and will bite and coil around anything that moves when it comes near them, including your hand. They may even latch onto you after you take them out of their enclosure and are holding them for a little while. If they get a good grip it may be necessary to pour a bit of Listerene into their mouth. This is normally very effective in getting them to let go and it doesn’t hurt them. Also placing them under cold water can work.
Out of all the food items, mice are the most practical in captivity. Kingsnakes will thrive on a diet of mice alone. Frozen mice can be purchased and sent overnight to your door. If packaged right, they will last well over 2 years in your freezer. Frozen mice can be thawed out easily by laying them out to thaw at room temperature or they can be soaked in warm water to thaw out faster. It would be best not to use extremely hot water or sit them right next to a hot light bulb when thawing. They can easily cook and when the snake eats them, they will burst open at the gut making a big mess. If they are thawed in water, they should be dried off as best as possible if you are going to feed them to your snake in his enclosure. Substrate tends to stick to a wet mouse and most of it is ingested with the mouse. You want the snake to ingest as little substrate as possible. Large amounts of substrate ingested can lead to impaction over time. Because the snake can’t digest this mass of substrate, it will have to be surgically removed or else the snake may die. This is one reason why some keepers prefer to feed their snakes in a container or box. To reduce the chances of impaction place the dead food item on a plate or anything similar inside their enclosure.
With some Cal kings, it’s important not to make any quick movements during feeding. Some may let go and show no more interest in feeding for the day if bothered. Sometimes they will eat from your hand or tongs, other times you’ll have to leave the food item in their cage and just come back later.
Its completely normal for snakes to refuse food at times. Most won’t feed a week or two before they shed. Some will start refusing food in August and eat way less often than they did in the spring. This can last all the way to the following spring. Lots of new keepers panic when these issues arise. Don’t panic. Make sure the conditions your snake is being kept at, are right. Make sure your snake is not being stressed. Excessive handling, rough handling, lots of movement near the cage, kids jumping and running around in the same room as the snake, too much light with no hide place, a cold draft from the air conditioner are just a few things to watch out for. There’s always a possibility it is sick and this might not be easily detected. It becomes a judgment call on your part if you want to give it more time or take it to a reputable reptile vet.
Juveniles can be fed baby mice, which are known as pinkies. Juvenile snakes should be bothered as little as possible when they are first introduced to their new homes. Some can stress real easy and refuse to eat and others will eat no matter what. When offering a pinkie, you can leave it at the entrance of their hide place or what I like to do is place them with the pinkie inside a small paper bag, fold down the top and paperclip it. I then set it back inside their cage and close the lid. Normally they have eaten when I return to check on them in an hour. Other types of containers can be used for this purpose also. This is also a good method to get baby snakes and even shy adults to eat that refuse to eat in their enclosure. If a baby is refusing to eat, be sure its being kept at the right conditions. Make sure it has adequate heat and good hiding places. Be sure it is being kept stress free away from kids and dogs and cats. Some methods used to get baby snakes to eat include teasing the snake with the dead pinkie and try to get it to strike. Sometimes it will strike, bite down and swallow the pinkie. Another way is to hold the snake in your hand near its neck so that its head can move freely around. Take a pinkie and continuously poke him in the face with it. Sometimes the snake seems to get mad and bites down on the pinkie and swallows it. If that doesn’t work, force the snakes mouth open and place the pinkie in his mouth and slowly let go. Sometimes if you push the pinkie down the snakes throat a little ways, it will eat it. Scenting the pinkie with a lizard often works. Wash the pinkie with soap and water and then rub a lizard all over it. If the lizard is dead, you could just freeze it and use it the next time. Using the water from a can of tuna can also work when scenting. If the snake is taking scented pinkies, you need to eventually get him off of that. To do that scent the pinkie less and less every time until scenting is not required. If these methods don’t work, you can try braining the pinkie. Take a sharp razor blade and cut into the pinkies head to get to the brain. Once that is done, squeeze the head to get some of the liquid brain to come out. rub that liquid all over the pinkies mouth and face. Then place it with the snake in a container or small paper bag and leave it alone for a while. This method is pretty disgusting, but works surprisingly often. Another method that works good is to place the frozen pinkie in boiling water for about 30 seconds. Place it in a container or bag with the snake after that. Sometimes nothing really works and its best just to brumate them for the winter at reduced temperatures. They normally come out of brumation with a very healthy appetite. See brumation. Juvenile snakes can be fed every 3 to 7 days. If they are fed too infrequently or too small of a meal for their size, they may not grow at all and are only eating enough to stay alive. Their food item should be around one and a half times their size at mid body. You should be able to see a noticeable bulge right after they eat. Some may only want to eat one food item, others may eat multiple. Generally the larger and more frequent the meals, the faster they grow. Normal shed rates for juveniles is from a little less than a month to a little over a month. The more they are eating, the faster they are growing, the more frequent they will be shedding. Cal kings grow pretty quickly during their first two years. They slow down considerably after three years, but still continue to grow slowly. Their shed cycles also become less frequent the older they get. Adults can become obese if fed too often, so you must be sure they are not eating too much. Generally, feeding every 10 days to two weeks is fine for adults. Female breeders should be fed more often depending on their weight. Juveniles cannot be over fed, they’ll just grow faster.
Some California kingsnakes develope a very aggressive feeding response and will bite and coil around anything that moves when it comes near them, including your hand. They may even latch onto you after you take them out of their enclosure and are holding them for a little while. If they get a good grip it may be necessary to pour a bit of Listerene into their mouth. This is normally very effective in getting them to let go and it doesn’t hurt them. Also placing them under cold water can work.
|
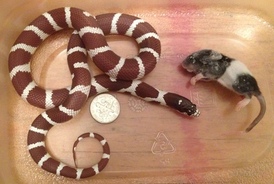
The juvenile in this photo is less than a year old and ready to move up to fuzzies. Notice how the fuzzie is about one and a half times the diameter of the largest part of the snake. This is a decent sized food item.
|

Some California kingsnakes begin to refuse food in the months of August and September. This will even happen when kept warm. They usually don’t completely stop eating, they just take meals less frequently. Maybe only one mouse every 3 weeks to a month or more. The keeper doesn’t need to be alarmed at this point. Cal kings can be fed throughout the winter, but if you are planning on breeding them or have an adult or juvenile that just won’t eat, it may be best to cool them down for the winter. This cooling period known as brumation, should take place from around November or early December to around mid March. Snakes should not be fed for two weeks prior to cooling, so that their stomachs are completely empty of any undigested food. This is very important, because that food can kill them in brumation if its not fully digested. The standard way of brumating is by using a refrigerator or wine cooler. The snake should be placed in a plastic container with a small bowl of water. Some keepers use moistened Paper towels or sphagnum moss to keep the snake from drying out, but a simple bowl of water does the trick as well. Over a period of a week, the temperature should be gradually dropped from room temperature to between 55 and 60ºF. This can be achieved by closing the door of the refrigerator or wine cooler, more and more each day. If your refrigerator is too cold with the door shut, you may have to crack it an inch or so, or get a thermostat. Just be sure the snakes have fresh air and don’t become too moist in their container. Water should be periodically changed as well. When its time to bring them out of brumation, you simply reverse the process by letting them warm up to room temperature over the course of a week. After they reach room temps, you can turn on their heat and start offering food. I brumate my snakes a different way. I simply keep them in their cages and use room temperatures in an unairconditioned room. Living in Los Angeles normally provides the ideal temperatures. They are kept a bit warmer from upper 50’s to mid 70’s on some days. The majority of time is in the 60’s. Three months of brumation is the standard time, but I normally let them go for about 4 months.

Once you start feeding after brumation you should feed females as much as they want and as often as they want. Males sometimes refuse food during breeding season. The best time to introduce the male to the female is after she has shed, but if she sheds very soon after you start feeding her, she may not be ready and you might have to wait until the next shed or a month or so after the date she started eating. The reason there is a waiting period is because the female must develop follicles, which is the beginning stages of the eggs. At this time the female will look a little more plump around the last half of her body. If you let a calm and relaxed female crawl through your hands, you can often feel the developing eggs especially if your finger is placed right on her belly. At this time, start introducing the male into the females enclosure and keep an eye on them for about 5 minutes. After that you can leave for about 5 minutes and check back in on them. If the male is interested he will chase around the female and attempt to pin her down and even bite down on her and hold on in an attempt to subdue her. At this time he will lift his tail and attempt to line his anal plate with hers. The female will thrash her tail around violently if she in not receptive. If this is the case, separate them and try again in a few days. If she is receptive, she will allow him to make his advances towards her. Once they have started mating they remain locked up for 3 to 7 hours in my experience. At this time you can see a small bulge in the female where the hemipenis has entered. this is because the hemipenis swells up during conception. I regularly check in on them so that I can be there to separate them once they have separated on their own. As soon as they are separated, I put the male back in his cage. You may also pair them up a few days later to ensure a high fertility rate, but once is often enough. The male can also be mated to a couple other females at this time too. I would give him at least a day or two off between matings. The photos bellow should serve as a reminder that these kind of snakes need to be checked frequently.
|
|
|

Your female should quickly swell up with eggs after mating. Its important they have a hot spot of at least 90ºF at all times. Continue feeding the female as much as she will eat. This is necessary if you are attempting to get a second clutch out of them. Some females will go off feed soon after they become gravid. At this time try feeding them a food item about ⅓ the size of what they normally eat. Often they will accept these smaller meals. Also try to handle gravid females as little as possible.

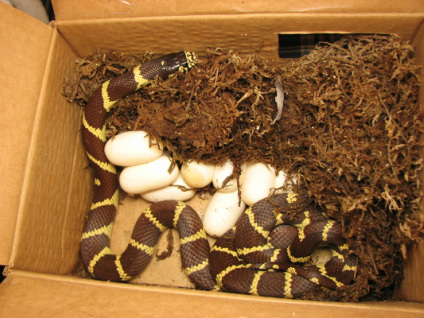
About four weeks after kingsnakes have mated, the female will be swollen with eggs and will go into a pre lay shed. A week or so after she sheds, she begins cruising around the cage searching everywhere. After a few days to a week of doing that, she will lay her eggs, which may take from several hours to 48 hours. I've had kings lay eggs as soon as 25 days after mating, so it might be a good idea to have the lay box in the cage sooner than later. After she sheds, its always a good idea to remove the water dish in case she decides to lay her eggs in the water, which will drown them. There are several ways of preparing a moist place for her to lay her eggs. One method is to use a box or container filled half way or more with stuff like sphagnum moss, peat moss, or even vermiculite. These substances can be used together or by themselves and they must be moist, not wet.
A spray bottle filled with water can be used to moisten the sphagnum moss. The lay box should be closed, preferably dark inside, with a hole on the side to allow entry. Another way is to make the entire enclosure the lay box by replacing the substrate with moist sphagnum moss, peat moss, or even a mixture of peat moss and sand. Make it about 5 inches or even more deep and place a good sized tile on top of the moss on one side of the cage. The tile should be large enough for the snake to get under. It must also not be too lite, like a piece of cardboard. The snake will make a little nest by moving the substrate creating a little pocket and the snake will then lay its eggs there. When you find the eggs, they will normally be stuck together in a clump. You can leave them in a clump or you can separate them by pulling them apart carefully and slowly. I always keep mine stuck together. Always keep the eggs right side up the way they were found.
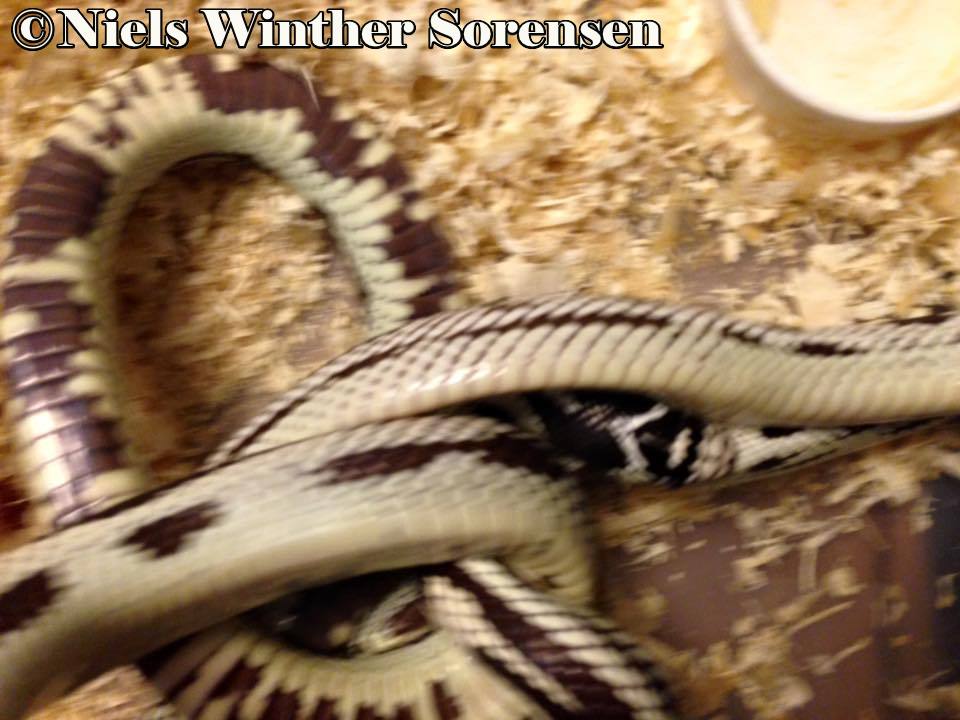
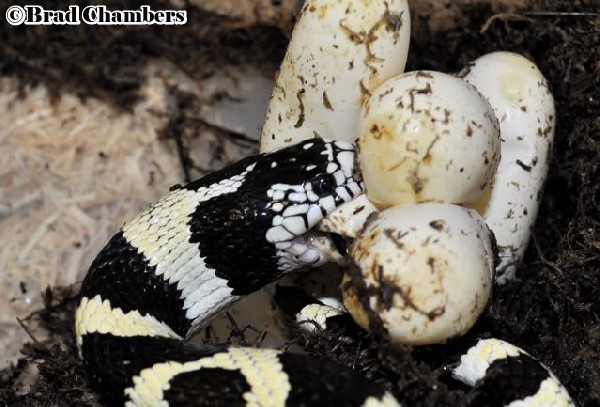
Its also always a good idea to remove the eggs as soon as possible. Sometimes the female will eat the eggs. This photo by Brad Chambers is of a mother in the process of eating her own eggs.
Its also always a good idea to remove the eggs as soon as possible. Sometimes the female will eat the eggs. This photo by Brad Chambers is of a mother in the process of eating her own eggs.

If fed well, a female can produce a second clutch of eggs. Sometimes a second clutch can happen without even trying. To help ensure a second clutch, you want to be sure to get the female to eat during the time she is gravid. This may involve smaller meals about ⅓ the size of normal if she is getting fussy with her eating by refusing to eat. Because females are pretty skinny after laying a clutch of eggs, it is necessary to feed her really well afterwards. This will further the likely hood of her laying a second clutch. Her first meal after laying eggs should be smaller than normal. After that, you can give her full size meals. You can start reintroducing the male again after just a few meals when she starts putting a bit more weight back on. This is also when she will begin to ovulate. There is no real set time, just keep on reintroducing every several days to a week and they will likely breed again.

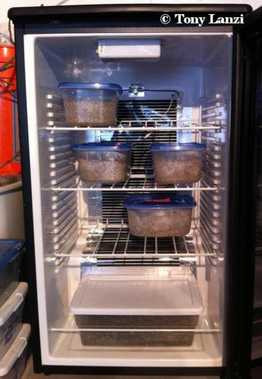
Be sure to disturb the female as little as possible while she’s depositing her eggs. This process can take up to 24 hours. You can often tell she has not finished depositing all of her eggs, because you will see bulges in her near her vent. Once there are no obvious eggs in her, you should check by feeling down her belly. If there are no eggs left, go ahead and remove the eggs and place them in the container you are going to incubate them in. Some females will eat their eggs, so try to get them out as soon as possible. This is not common, but can happen. Find a plastic container with a lid that is at least 4 or 5 inches tall. Fill it ¾ full with either, sphagnum moss, vermiculite, peat moss or perlite. Whichever you chose to use, be sure it is always moist, not wet. You can use a spray bottle to add moisture. Poke a few small holes in the lid. These holes should be about the diameter of a tooth pick. Place the eggs in the container and be sure the lid can be closed without them too close to the lid. Eggs will grow or swell up a little, so always allow a bit of growing room in the container. Eggs are normally clumped together and stuck. Some keepers like to separate them and lay the eggs individually in the container. They can be pulled apart slowly and steadily without ripping, but you have to be careful. This is too nerve racking for me, so I always end up incubating the entire clump together. The incubator on the right was made by using an old refrigerator and adding a large piece of heat tape and a thermostat.
Eggs kept at a constant 80-82ºF will generally hatch in about 60 days. The cooler they are kept, the longer it will take. I had a friend incubate a clutch of Cal king eggs in the mid 70º range and it took them nearly 90 days to hatch. Temperatures can drop really low during incubation without any ill effects, but eggs are sensitive to too much heat. You never want your eggs to reach temperatures above 85ºF. They can easily die above that temperature. Because they are incubated during the summer, you need to be sure wherever they are kept will not get above 85º. Lots of people have had accidents when they kept the eggs somewhere that rose to a lethal temperature during an unexpected heat wave.
One way to incubate your eggs is by using an egg incubator made especially for reptiles. There are several types and brands available for purchase online or in a shop that specializes in reptiles. Then there is the old fashioned way where you simply place the container with eggs, in an area of your home with suitable temps. You must be very careful of overheating when using this method. Because it is nearly impossible to maintain a constant temperature of 80-82ºF, it will more than likely take your eggs at least a week longer to hatch using this method.
During incubation, your eggs will fill with moisture and oxygen and feel hard or tight like there is a good amount of pressure inside of them. This is normal and a good sign they are doing well. Too much moisture can lead to the egg absorbing too much water and even to the point of splitting open and leaking its contents. Generally the embryo is dead by the time you get to that point. Too little moisture can also kill the embryo. When an egg is drying out, it loses its pressure and becomes very soft. If nothing is done, it will start to collapse and look as if it has large dents in it. If caught in time, the eggs can still be saved by adding moisture and completely covering them with moist sphagnum moss or whatever you might be using to incubate them in. Just be sure they can still get oxygen. It normally takes 2-3 days for them to fill back up. Condensation will form on the side of the container the eggs are in and that’s normal. Too much condensation may be a sign of too much moisture. If you feel you have too much condensation, remove the eggs and remove a little of the moistened substrate and then add dry substrate to the remaining moistened substrate and mixed it all together. Its always better to error on the side of too dry than too wet, because its easier to notice when they are too dry.
|
Sphagnum moss
|
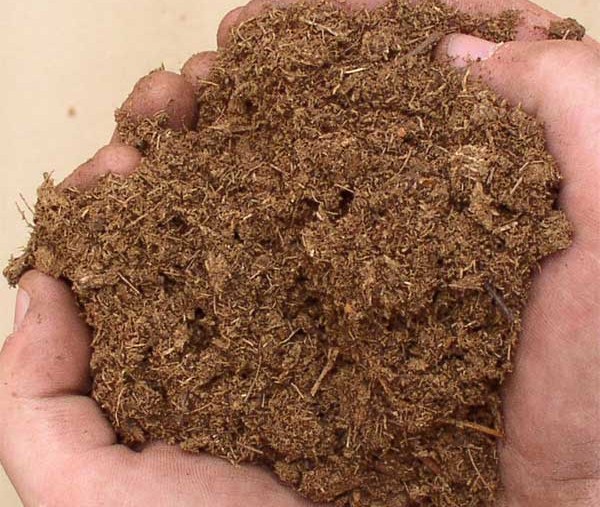
Peat moss
|
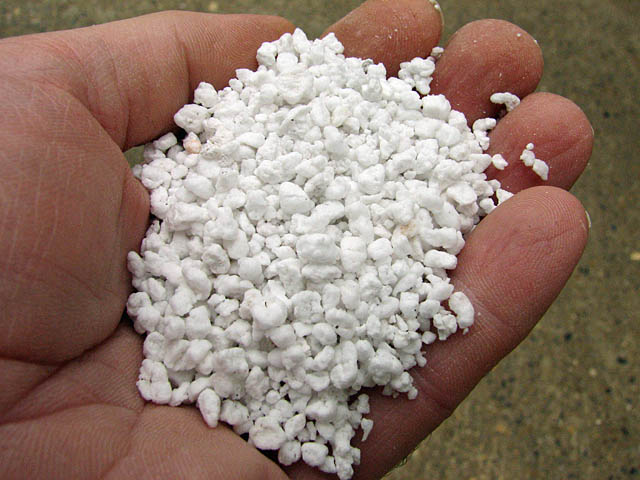
Perlite
|
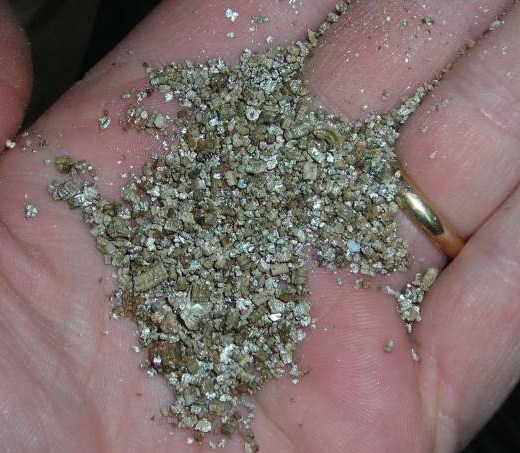
Vermiculite
|

To the experienced keeper, infertile eggs are pretty easy to distinguish. They can often be small and discolored, not the bright white of a nice looking fertile egg. Some can look really yellow, but there are fertile eggs that can have a yellowish tint to them at first. Sometimes an entire clutch will be infertile. It can greatly vary how many eggs in a given clutch are fertile and how many are infertile. The best way to check if an egg is fertile is by waiting about a week after the eggs have been laid and candling them. The easiest way is to take the eggs in a dark or dim room and point a small bright flashlight against them making them glow. If they are fertile, you should be able to see red veins inside the egg. Any questionable eggs should be saved. Eggs that are not fertile will soon mold over and go bad. They will also give off a bad smell. At that point, throw them out if they can be separated. Sometimes good eggs will still mold over and hatch. If you have eggs you suspect are good and are getting moldy, you can easily brush that mold off with a dry soft bristle toothbrush. Eggs are not that sensitive to where they can’t be taken out and rinsed off. If you have a spoiled egg in a clutch thats stuck together, you can take out that clutch, cut open the bad egg, and run it under water in the sink to wash away all the bad yoke. You can even pull or cut away excessive parts of the shell that is left over. I had an egg once that looked undeveloped on one end. the rest of the egg looked good, but that one part was pinkish, then after several days it turned yellow with the rest of the egg still looking normal. Experienced herpers told me that yellow coloration was a sign of it being dead, but to still hold on to it and see what happens. I kept it and and the yellow area constantly grew mold. I brushed it off every few days with a dry toothbrush. The egg never went bad and hatched a nice healthy baby. I also had one egg stuck to a clutch of eggs that candled out infertile. I kept the egg and it always looked like all the other eggs except when I candled it, it seemed to have a yellowish liquid inside, which was much different than the rest of the eggs. That egg didn’t go bad until almost two months into incubation. It was infertile, but held up a long time without molding.

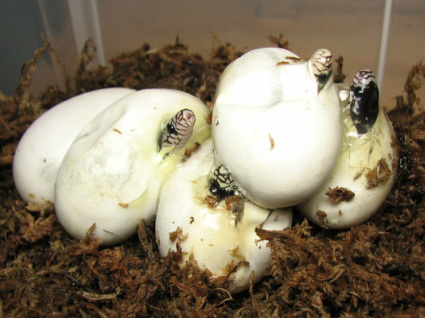
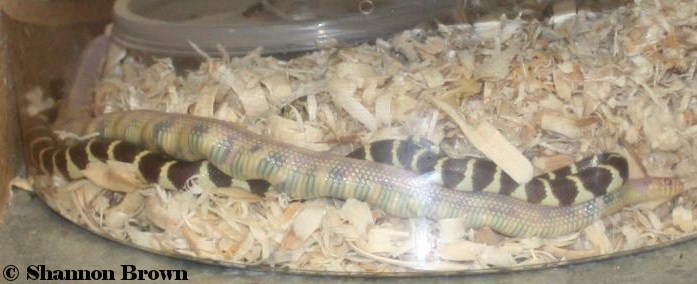
About a week before the eggs hatch, they will sometimes start to soften up or lose pressure. At this time, you don't need to add water, its natural. One by one the snakes will start slitting their shells with a little egg tooth on the end of their snout. Those fall off right after hatching. At first you might just see slits in the eggs with clear yoke slowly oozing out of them. After that, the babies will start poking their heads out. If you bother them, they will go back in their eggs, but will soon come back out. Its best to bother them as little as possible at this point. Sometimes the eggs start hatching all at once and sometimes they hatch over the coarse of a few days. After a few days, if an egg hasn't hatched, you can cut a small hole in the egg and check if the snake inside is dead or alive. If you poke it a little, it will move if its alive. Always let the snakes leave the eggs on their own, or else you might kill them if you pull them out too early. Once they have left the egg, its a good idea to put them in their own container, because baby kingsnakes are notorious for eating each other. Now, you can keep them together until they shed, but you are taking a chance. After a week, they shed their first skin. During that week before they shed, they will look dull, but they will look nice after they shed. Below: This albino Cal king ate its clutchmate before they could be separated. You can see the pattern of the other snake right through the skin.
In 2016, Adam Helbert hatched 3 sets of twins out of a clutch of Grease king eggs. This is the most sets of twins I've heard of from a single clutch of eggs.
|
|

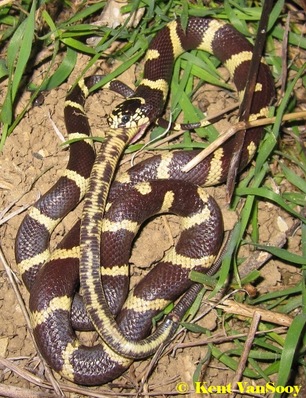
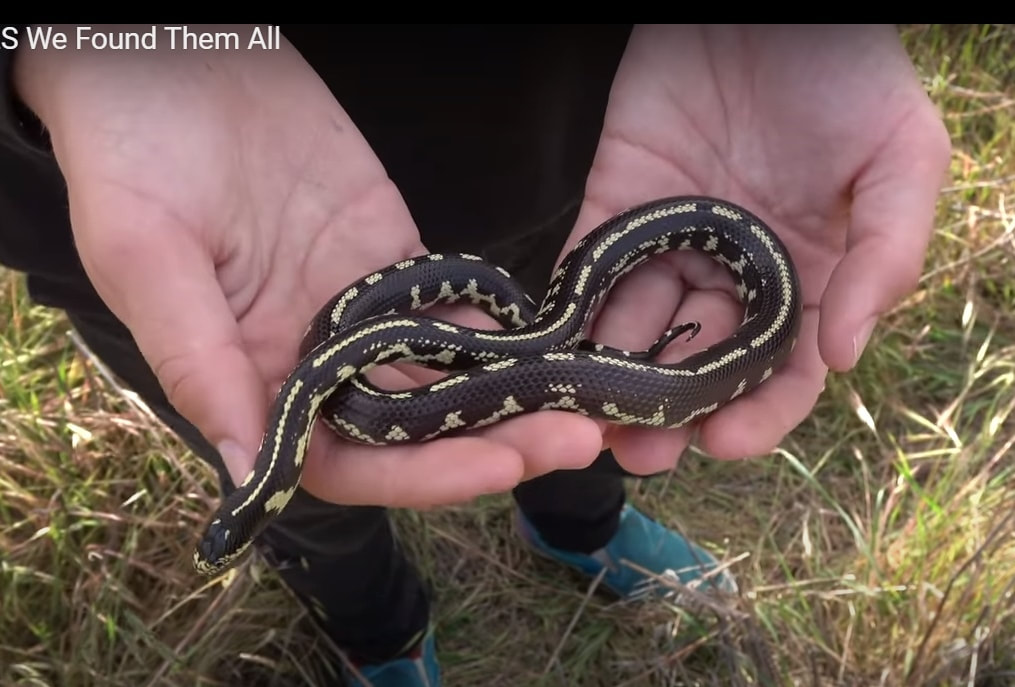
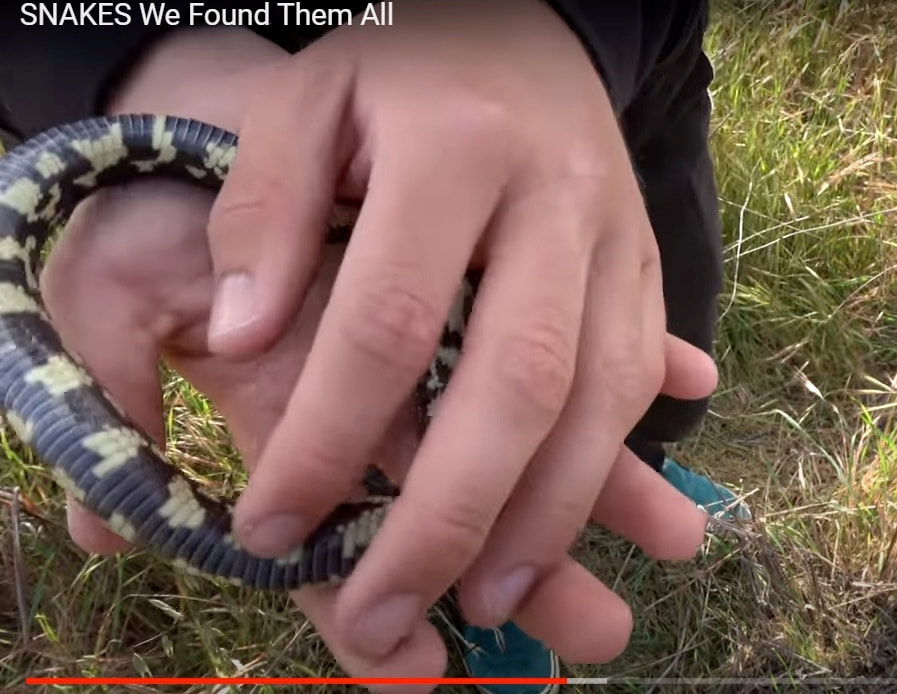
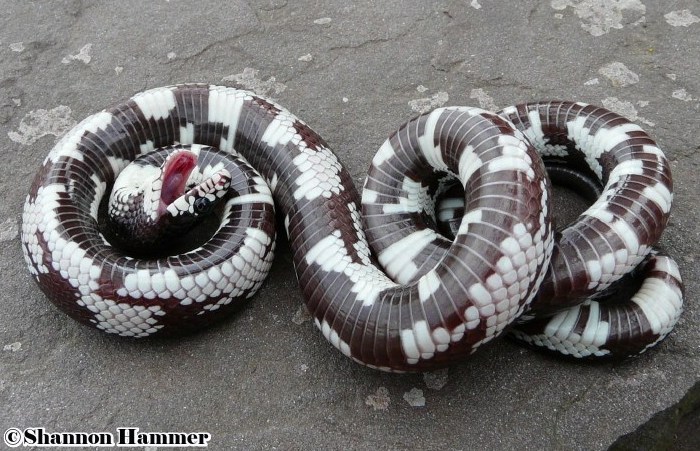
Wild caught kings and juveniles in particular are very defensive. Juveniles are normally very quick to coil up, vibrate their tail, and strike. A kingsnake that strikes in defense typically doesn't do so with the intent of constricting and consuming. They simply strike with their mouth open and all you feel are their tiny teeth. Their teeth are small and very sharp and can scratch you enough to draw blood as far as adults, but there is practically no pain at all. When first captured in the wild, Cal kings of all ages will musk on you. This foul smelling fluid is expelled from scent glands located just behind the cloaca. They will often smear it on you or even throw it on you from quick movements from their tail. Juveniles, whether wild caught or captive born, musk much more often than adults. Some wild caught females have been known to expel blood from their cloaca during capture. This is normally in very small quantities. In the wild some Cal kings will coil into a ball and hide their heads in the middle, but not nearly effective as pythons. Shannon Hammer was trying to photograph a Cal king that was being very resistant when all of the sudden it rolled over, became limp, and opened its mouth. She returned it to its cage and it quickly rolled over to its upright position and crawled into its hide.

Snake mites are tiny little black bugs that are like fleas on a dog. Its natural for snakes to have "some" mites in nature, but in captivity, mites can kill a snake. In nature, when a snake sheds its skin, it gets rid of a lot of its mites and crawls away. In captivity, they can't get away from the mites. The mites are not just on the snake, they are throughout the cage and will even spread to other cages. For this reason, they must be killed. If your snake has mites, you might see one crawling on the snake or on your hand after you handle your snake. Sometimes you can see them between the scales under the chin or around the eye socket. You may even find them at the bottom of the water bowl if your snake goes in to soak. The most noticeable way to detect mites is by looking at the scales on your snake. Scales in different places will shrivel up from mites. There are different ways to treat snakes for mites. I will list 3 of the more popular ways.
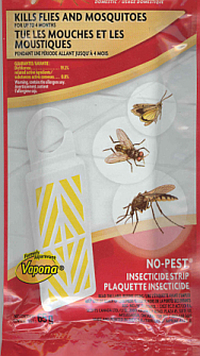
Pest stripes: This is the method I've always used and they have worked 100% of the time. Basically a pest strip is a yellow plastic type strip about a quarter of an inch thick. For a cage about the size of a ten gallon tank up to a 20 gallon, cut a piece 1 inch by 1 inch and place it in a small container with holes, so that the snake can't come into contact with it. If the cage is really big, try making two and place one on either side of the cage. I've always used pest strips in glass tanks with screen tops. I don't know if I would trust using them in a plastic tub from a rack. Their ventilation may not be as good and the plastic might hold in the fumes, if that's even possible. But when using it in a glass tank, take out the water, place the container with the pest strip in there along with the snake for 24 hours. After that you need to remove the pest strip, put the water back in, and repeat this in 7 days. The reason why you repeat this a week later is because the pest strip doesn't kill the mite eggs, but they will hatch within that week and that's when you can kill them. I have used both of these brands of pest strips and they've worked well for me.
|

|
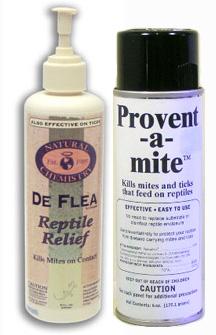
Provent-a-mite and Reptile Relief: These products are also very effective when used together. First thing you want to do is take the water bowl and any other decorative items in the cage and soak them in a bucket or tub filled with warm water and some bleach. Make sure they are completely submerged under the water and let them soak for at least 20 minutes. In the mean time, dump the old substrate out of the cage or tub and throw it out. Put it in the outside garbage, because there are mites in it and you don't want them coming back to your snake. If it makes you feel better, place the old substrate in a plastic trash bag and spray some proven-a-mite in the bag on the substrate, then close the bag and tie a knot. That should kill most if not all the mites in the substrate, but its still recommended to throw that substrate out. Then wash out the cage or rinse it out and dry it with a towel. Then place your snake in the cage and spray Reptile Relief on it from head to tail. Be sure to get the underside of the snake as well. Let the snake sit like that for 15 minutes, then rinse it off with water. Spray a little more Reptile Relief in the cage and wipe it down with a paper towel. Now add new substrate to the cage and spray the substrate with Provent-a-mite. Read the directions on how much to apply, it doesn't take much. Because the fumes are so strong, you might want to do this outside. Let it dry for about 10 to 15 minutes. During this time you can take the water bowl and other items and rinse them off with clean water very good until you can't smell bleach on them any more. Dry them off and you are done. Place everything including the snake back in the cage after it has dried out. Now this method is said to work very well, but I've never tried it.
Nix: This is another method that is recommended by a lot of keepers. This is a 2 part video showing how to use nix.
|
|
|